Rollcalls and student registers can be done at any time on any device with internet connectivity.
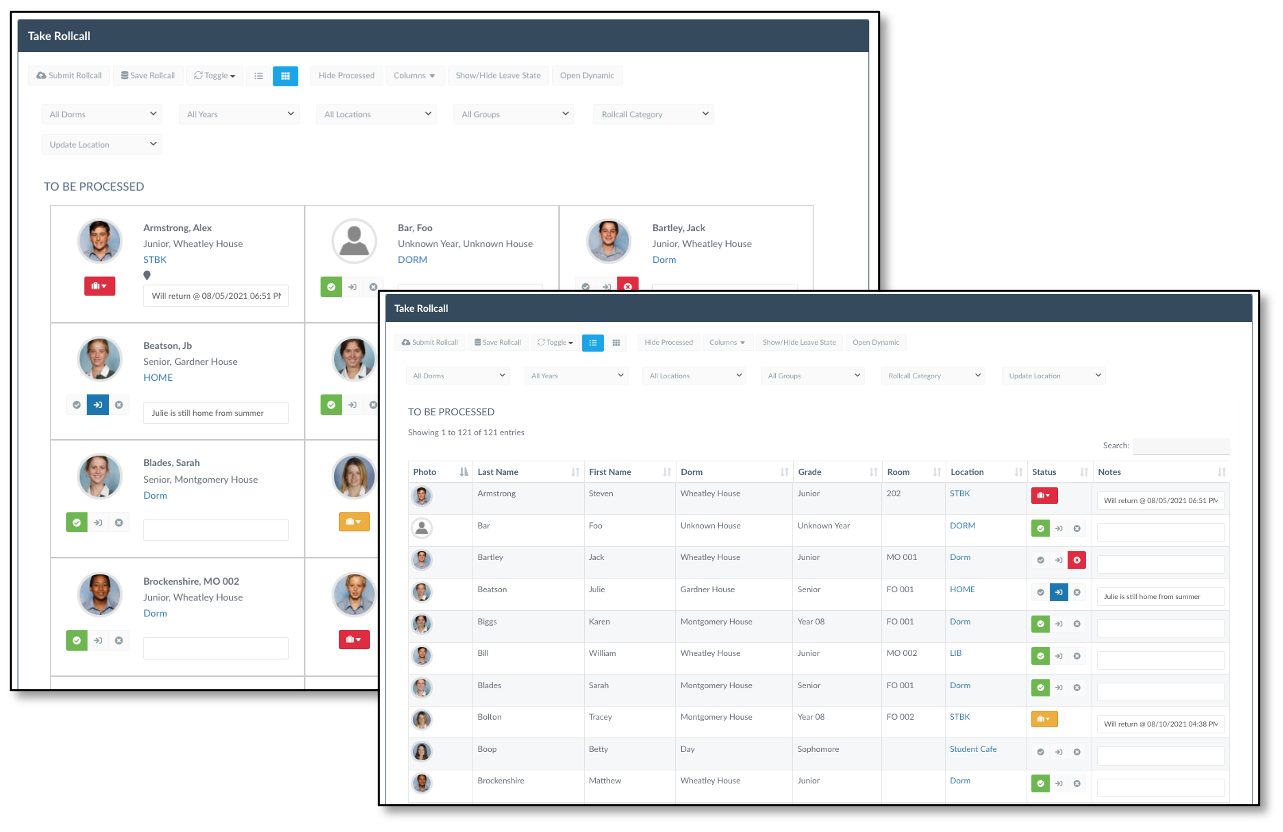
Important functions when taking a Rollcall
- List or Grid View - Switch between views using the icons at the top of your screen.
- Filter you student list - Select the student population that you are taking a rollcall for by using your filters.
- Select roll call category - Select the roll call type for the rollcall that you are submitting
- Student on approved leave are identified - Students who are on an approved leave event are identified with an orange suitcase and their expected return time is listed in the Notes field (red suitcase indicates a student is late for their expected return time)
- Mark your students as Present, Absent or use the blue middle button for any alternative status that your schools sets as your rollcall protocol.
- Enter in pertinent notes to accompany any student's attendance mark.
- Update Location - you can select a location from your system's location options to update the students who are marked present to a specific location in the system. (i.e. Evening Check In you can update all student locations to "Dorm" when the rollcall is submitted)
- You "must" mark all student on your list in order to submit the rollcall.
- You can save a partially completed rollcall and return to it. Saving will retain the rollcall for your device login only.
- Hide processed option will place any of your processed items to the bottom of your screen so that you can focus on the unmarked students.
- Toggle All option allows you to mark all students on your list as present or absent.
